Wondering how to clean a clogged dishwasher that has black gunk inside? I’m speaking from experience… because it happened to me.
So here it is 2 years later from the first time our dishwasher drain clogged and I was forced to do a major de-gunking in order to get it running back up to speed — because there was lots of slimy black stuff in the dishwasher.
That was then, this is now:

Today, when I glanced at that dishwasher basket in the far back, I noticed black stuff in the dishwasher. There was lots of black gunk that had built up underneath the basket itself.
There was so much black stuff in there that you could actually tell from a distance there was some serious build-up going on in there. No water backing up this time, just lots of slimy black gunk.
Here’s what I did. (My process this time was much the same as last time, with 2 entirely new steps.)
So without further ado, here’s how to clean a clogged dishwasher and remove all that black, slimy stuff…
How To Clean A Clogged Dishwasher
I decided to get a jump on it before the dishwasher doesn’t drain again like before.
So I armed myself with all of the necessary dishwasher cleaning and de-gunking materials:
- 1/4-inch Wrench (to unscrew those 2 long screws that hold the dishwasher basket in place)
- Flashlight (to visually confirm that, upon closer inspection, yes there was some serious black gunk building up underneath that dishwasher basket)
- Paper Towels (lots — to quickly wipe up most of the mess & toss right into the trash)
- Soft Cloth, wet (to leave the dishwasher in pristine clean condition after removing all the black gunk)
- Turkey Baster (to siphon out some of the water that had accumulated up to the rim of the basket/flapper — there wasn’t water on the dishwasher tub floor this time)
- Mirror (to see way in the back and make sure that I’d removed all of the black gunk)
After I removed the dishwasher basket from the back (the part that keeps large food debris out), I cleaned out all of the black gunk. I’m telling you, this is some thick and slimy stuff!
Then, I put the basket back in place using the steps that I outlined here.
These are the before and after photos:
My 2 New Steps… How To Clean A Clogged Dishwasher
By the looks of things, I’m guessing I’ll have to do this type of dishwasher cleaning every 2 years or so.
I’m also taking a few extra precautions by following these 4 tips for keeping your dishwasher running smoothly for years.

The 2 things I plan to do regularly from now on are:
#1 – Each time before running the dishwasher, run cold water through the sink garbage disposal for 30 seconds first — to prevent food and debris that’s in your garbage disposal from getting sucked into your dishwasher’s drain line and clogging it.
#2 – Fill the detergent and the drying-agent dispensers with white vinegar, then run the dishwasher empty on the pots-and-pans cycle — to keep the dishwasher drain lines clean and free-flowing. (Because vinegar is a great de-gunking dishwasher drain cleaner!)
Some recommend pouring 1 entire gallon of vinegar into the bottom of your dishwasher and letting it sit for 1 hour. This will loosen the most stubborn scum and gunk that has settled in. Then, run the dishwasher on a short cycle with no detergent.
How To Clean A Clogged Dishwasher Before The Water Backs Up

I would strongly recommend that you always keep a step ahead of your dishwasher on the de-gunking process — because it’s 2 to 3 times more effort (and much smellier and messier) if you wait until the water has actually backed up inside your dishwasher and wreaks havoc on your floor!
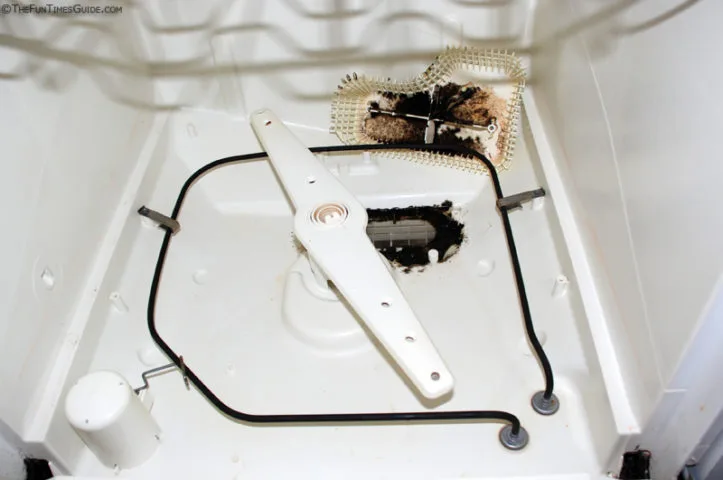
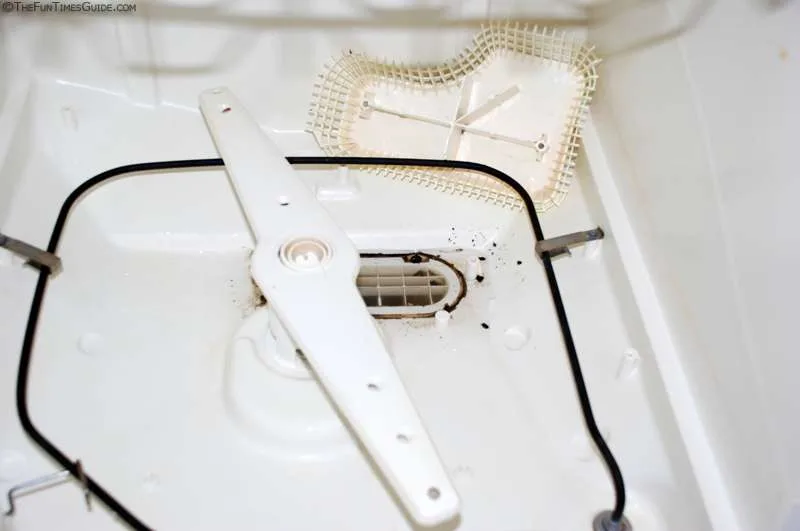
Take a look at the first photo in this article again — you can barely tell there’s anything wrong.
But if you look at the next picture — you can see all of the black slime and food stuck to the underside of the dishwasher basket. It was also lining the entire tub of the dishwasher underneath the basket. Ugh!
A helpful tip from The Family Handyman:
When your dishwasher no longer gets your dishes clean, a food-filled filter is most often to blame.
If it’s clogged, water can’t make it to the spray arms to clean the dishes in the top rack.
The fix takes 2 minutes…
- Simply pull out the lower rack and remove the filter cover inside the dishwasher.
- Then, use a wet vacuum to clean off the screen.
- While you’re there, slide the nearby float switch up and down. If it’s jammed with mac and cheese, you won’t get any water. If the cover sticks, jiggle it up and down and clean it with water.
Like this post? Save it to read again later… or share with others on Pinterest!