We’ve written about paint storage issues before:
- Here’s what we’ve learned about storing & using leftover paint.
- Here’s the best way to keep paint brushes from drying out when you take short breaks.
- And here’s my best tip for keeping the air out of a leftover can of paint.
I recently found another way to prolong the life of a can of paint by keeping the air out of it.
It’s called the Cansealid (as in… “can seal lid”).
Cansealid: A Reusable Lid For Paint Cans
I “met” the inventor of Cansealid in the comments section of a painting article online.
He was raving on and on about his silicone paint can lids. So I asked if he’d send me a couple of the lids to try.
I’m in the middle of a couple of painting projects right now, so the timing was just perfect.
Here’s my review of Cansealid paint can lids…
First Impressions
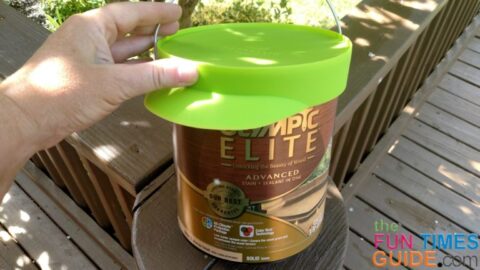
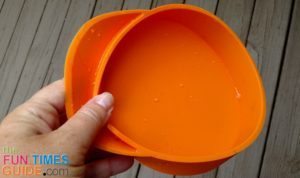
I received 2 Cansealids — one is green, the other orange.
At first glance, they reminded me of silicone lids for kitchen bowls and cookware. They closely resemble these silicone pet food lids that I use.
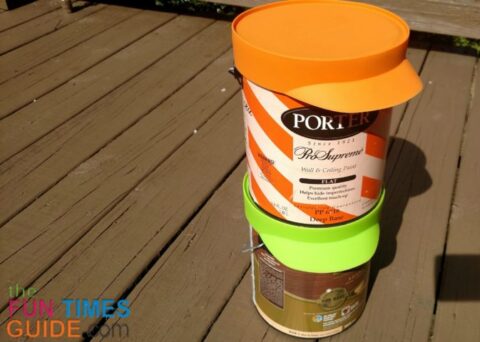
When you put a Cansealid on a can of paint, it looks like a baseball cap for your gallon-size paint can. The “visor” that sticks out a bit is what helps you get a good air-tight seal on the paint can.
The 2 things I was looking forward to most:
- NOT having to use a screwdriver (to pry open paint cans) and a hammer (to pound the lids back onto the paint cans) anymore.

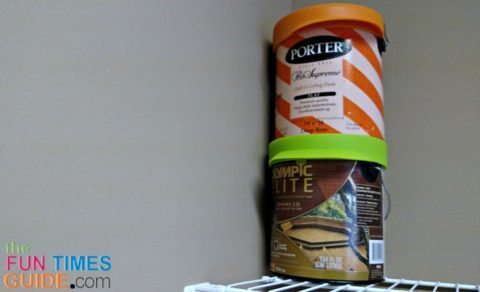
- Having clean paint cans neatly stacked together on our paint shelf (I’m a super-organized neat freak).
How To Use Cansealids
There aren’t a lot of instructions or anything to “figure out.”
The Cansealid is self-explanatory:
- Put the lid on the can (Cansealid stretches nicely so you can easily pull it completely over the paint can opening.)
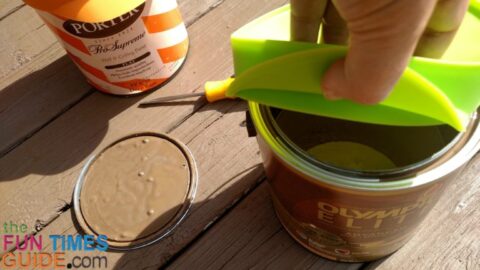
- Lift the lip of the Cansealid to release excess air from the paint can (This is the ah-ha moment. There’s a sense of satisfaction that comes when you get a tight seal on the lid after “burping” it like a Tupperware lid.)
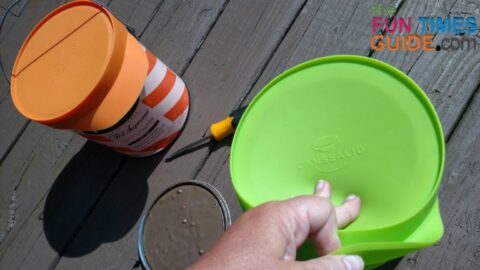
- Press down on the center of the lid to create the seal (Once it’s sealed, no more air can get into the paint can. You can tell it’s working because the lid is “sucked down” into the can opening a bit.)

Why Silicone Paint Can Lids Work So Well
Silicone rocks! I can’t say enough good things about the multitude of silicone products that I’ve purchased in recent years — everything from cooking utensils to bracelets to oven mitts.
Turns out silicone also works as well as a lid for paint cans — because it’s:
- Durable (will last forever; can’t damage it)
- Flexible (easily stretches)
- Lightweight (doesn’t add weight to the paint can)
- Thin (adds no bulk; takes up no extra space)
- Heat resistant (won’t melt in a hot garage)
- Stain resistant (paint won’t stick to it)
Pros & Cons Of Using Cansealid Silicone Paint Lids
Here are all the great things I’ve noticed after using Cansealid paint can lids:
- Since paint doesn’t stick to the Cansealid silicone lid, you buy it once and you’re done. Once that can of paint is gone, you can use the same lid on a different paint can — with no mess or dried paint transferred from can to can.
- The Cansealid paint can lid is easy to remove from the paint can the next time you want to use that leftover paint — because the paint doesn’t stick to the silicone like it dries and sticks to a metal can lid. No screwdriver needed — just lift up on the lip, break the seal, and paint!
- Touch-ups and taking breaks during large painting projects are a breeze — because it’s no longer a chore to locate the paint can, and then find a screwdriver to remove the lid from the paint can each time. And when you’re done, just slide the Cansealid back on, burp it, and you’re done.
- Paint cans are much more easily stackable with Canselid on than without. I’m not sure why paint can manufacturers haven’t given more thought to how poorly paint cans balance on top of one another. But for now, Canselid solves that issue. There’s a nice ridge around the top edge of the Cansealid — which makes stacking paint cans on top of one another very easy.
- Also, it doesn’t add any more bulk to your paint storage space. We have a shelf in the garage devoted to all our leftover paint cans, and the Cansealids made that shelf look better without taking up any extra space.
- There’s way less mess. Any paint that gets on the inside (or outside) of the Cansealid silicone paint can lid easily wipes right off — no matter how long it’s been there.
So, are there any downsides?…
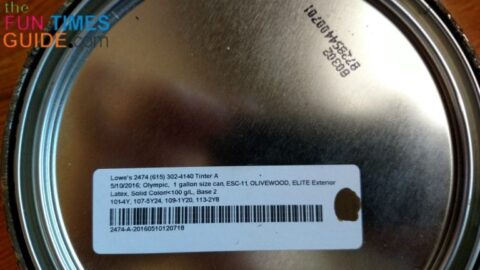
The only downside to using Cansealids that I can think of is the fact that you won’t have the original paint can lid that typically has the paint formula encoded on it.
My solution to that is:
- Take a picture of the paint can lid before throwing it away. Pictures are easier to take with you to the store anyway. That’s what I did last week when I went to get more stain for our deck. The picture worked perfectly, and I didn’t have to lug an empty paint can to the store.
- Or you could use a Sharpie to write the paint formula onto the Cansealid if you want. But personally, I want my Cansealids to be reusable on various paint cans throughout the years. So I won’t be writing on mine.
Paint Easily Comes Off The Cansealid?… Prove It!
As a test, I aggressively shook and turned upside down one of my paint cans with the Cansealid on it.
- I wanted to see if the paint would leak out underneath the lid — it didn’t.
- I also wanted to make sure that much paint would really wipe off the silicone lid — it did.
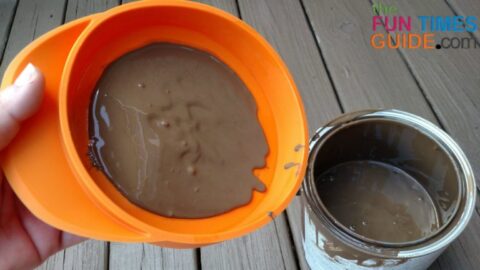
That said, when you shake the can and turn it upside down, large amounts of paint will accumulate on the inside of the lid itself. That’s to be expected.
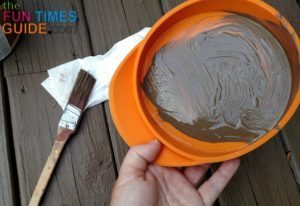
Since I didn’t want to put the Cansealid back on the can with that much paint (because it would drip down the sides of the can and create more mess), I decided to use the paint that was in the lid to do some of our trim work — no wasted paint here!
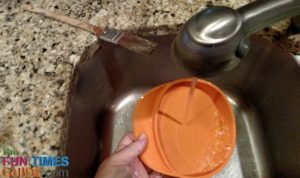
Then, when I rinsed out the paint brush that I used for the trim work, I rinsed out the Cansealid too. Trust me, every single bit of the paint was removed from the lid with just water. But you could use soap & water, if you want — it won’t hurt the silicone lid one bit.
Just be sure to dry the Casealid thoroughly before putting it back on your paint can. Otherwise, you might not get the perfect seal. (I used a towel to remove all of the water first. Then I let it air dry for 10 minutes or so.)
In case you’re wondering, yes the paint on the inside of the lid had dried so much that it had hardened to the touch. Yet it still wiped away easily with water hours later. I’m telling you, nothing sticks to these silicone lids.
I really like these paint can lids! I like ’em because they’re reusable, air-tight, no mess, stain-resistant, heat-resistant, easy to open & close, and stackable.
Why The Cansealid Keeps Paint Fresher Longer
Cansealid’s patented air-tight seal is designed to keep your paint fresher longer.
The silicone lid does fit really tightly on the gallon paint cans I have. The suction is so strong it’s obvious — because the lid gets sucked down into the can opening a bit.
Yet, because silicone itself is so flexible, the lid is still easy to maneuver onto the can yourself. It’s not a 2-person job.
Since I’ve only been using the Cansealid for a short time, I can’t comment on how long they keep the air out yet… but I plan to post an update here after some time has passed.
So I asked the inventor directly:
Q: Have you done any tests on how long paint will last in cans with these lids on — compared to how long paint will last with the regular paint can lids on?
A: “We’re still in testing, but from the first checkpoint at 2-1/2 months, there was less evaporation and separation than the can with the metal lid — approximately 1-2 mm. Unquestionably, the Cansealid was far easier to peel off than the metal lid, as I had dripped paint down the side of both cans.”
More About Cansealid
It’s been a pleasure getting to know the product’s inventor and seeing firsthand how well these silicone paint can lids really work. The Cansealid paint can lid is made in Canada.

