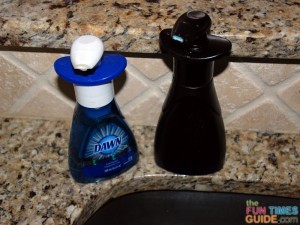
Seriously. They’re so darned convenient that I quickly became addicted. I was always on the hunt for good deals on little bottles of Dawn foaming dish soap.
When the soap ran out and the bottles became empty, I would just toss the bottle and replace it with a new one.
For awhile, I was thrilled to actually find Dawn foaming soap refill bottles. They weren’t nearly as large or economical as the regular Dawn dish soap that I used to buy at Costco (before I discovered the foaming pump bottles). But the refill bottles were a godsend for me — because it meant I didn’t have to throw away all of those little pump dispenser bottles anymore!
However, for some reason, the refill bottles of Dawn foaming soap have begun to disappear from store shelves. I have no idea why. I love this stuff! Surely other people do too. But I can’t find anywhere locally to buy it anymore.
Here’s why: people have figured out a way to make their own foaming soap to put inside those small Dawn pump bottles!
Yessireee. I am thrilled to report that you can, indeed, make your own foaming soap.
I do.
Here’s how you can too. Plus ideas for thinking beyond the kitchen and making foam soap for your bathroom sinks, for hair shampoo, even for dog shampoo! Also, see how to make your foaming soap bottles look much more attractive on the counter.
How To Make Foaming Soap
This recipe to make homemade foaming baby wash was my inspiration for this project.
I figured if it worked so easily using regular baby wash, then maybe it would work similarly with other liquid soaps.
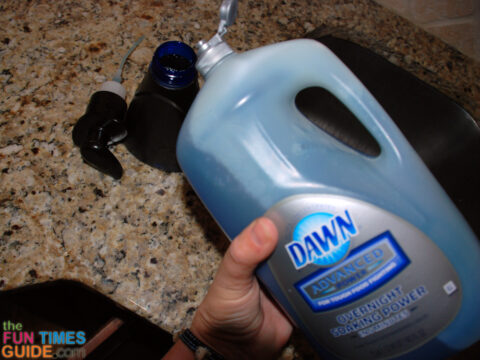
I decided to start with the regular, old-fashioned bottle of Dawn dishwashing detergent.
It worked!
Here’s the secret: Don’t use much dishwashing liquid. A ratio of about 90% water and 10% soap is what you’re after. And don’t shake to mix it up. Just let the water and soap meld together on their own.
The first time I tried it, I used way too much dish soap — probably a 50/50 ratio of soap to water. That didn’t work well at all. The soap came out of the pump looking much like it looks when you pour it out of the big bottle: blue and concentrated; not white and foamy.
So I emptied my pump bottle and started over from scratch.
This time I put only about a half inch of the Dawn soap into the pump bottle, and filled the rest of the bottle with plain water.
That was the perfect combination. I’ve refilled 2 separate bottles with my homemade foaming soap so far. Both continue to work perfectly.
TIP: Don’t overfill the pump bottle. You need to leave enough room for that large pump contraption to still fit inside the bottle along with the soap & water.
This Works For All Liquid Soaps
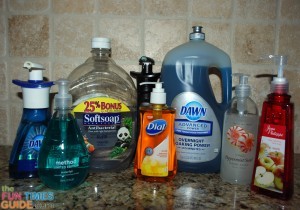
You can refill pump bottles with any liquid soap just as easily — even shampoos — as long as they’re not too thick.
Here’s a fun idea: If you bought a bottle of “regular” liquid soap because you happen to like the scent, but not the size, shape, or color of the bottle, then just transfer a little bit of it into a foam pump bottle that you like — along with some water. You’ll now have foam soap in a scent you love, a bottle that’s attractive, and you’ll get 4 to 9 times more soap in the long run (since you’ve diluted it with water to turn it into a foam). That’s a lot more pumps than you would get if you used it as a traditional liquid soap! What a great money-saving idea — especially if your favorite liquid soap happens to be fairly expensive.
Foam pump bottles are designed to work with a thin substance of water-like consistency. It must have sufficient surfactants (soap or detergents) to create the foam. The liquid should be water-based, and it has to be able to foam using only normal air (no gasses or other propellants). Many commercial soft or liquid soaps will work in the foam pump bottles if sufficiently diluted. However, often commercial liquid soaps, especially “gel” soaps, contain thickeners. Soaps with thickeners may require so much water to dilute them to “water-thin” that the effectiveness and foamability of the soap is compromised. Source
Think Beyond The Kitchen
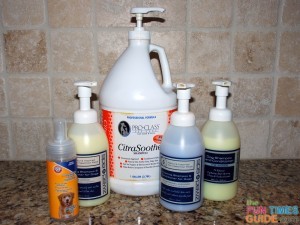
And if you have pets, you can even transfer “regular” pet shampoo into a foam pump bottle. I’ve found that it’s much easier to bathe my dog using a thicker foam shampoo than it is to use a runny liquid shampoo.
- It lathers in his coat faster.
- It’s easier to put it right where you want it on the dog’s body.
- There’s little to no waste since it does’t drip and slip through your fingers when applying it to the dog’s coat.
- And I get many more uses from each bottle of dog shampoo that I buy!
Just remember to use that important formula of 10% product to 90% water when you’re mixing a liquid soap (or shampoo) with water to make a foam soap.
I’ve heard that others have had success with a 25% ratio (1/4 soap and 3/4 water), but that just uses more product than you need in my opinion. (When using Dawn dish soap anyway.) The less soap it takes to make it foam, the more money you’re saving in the long run.
NOTE: Some soaps may have more or less water already in them. Therefore, the exact ratio of soap-to-water may be different, depending on the liquid soap or shampoo you’re using. So feel free to experiment a little to find the combination of soap-to-water that works best for you. It’s safe to say you should always use more water than soap though.
You want to dilute the soap as much as you can, while still keeping the desired feel and consistency in the foam. As a general guideline, you should be able to dilute your normal liquid soap by 3 to 6 times. Start with 1 part soap and 3 parts water, and see how it feels. Add additional water until the foam just barely starts to thin out. Slightly LESS than that amount of water is the right amount use with that particular type of soap. Source
Since I love how convenient this is for washing hands (and dishes) in the kitchen, next I plan to do the same thing for each bathroom sink in our house. I have a few empty Dawn foam soap bottles that are just waiting to be painted to match each bathroom’s unique decor. I’m thinking of getting a couple of other foam pump bottles too (rather than having all of the soap dispensers in our home look like painted Dawn soap bottles).
Reusable Foaming Soap Pump Bottles
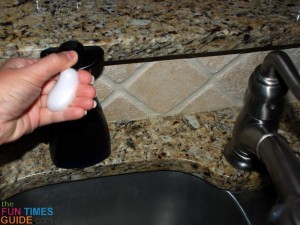
The foam pump has 2 chambers: one pumps liquid surfactants (soap or detergents); the other pumps air. Each time the pump is depressed, the liquid and air are forced at the same time through a single tiny nozzle which creates the foam. (Foam is a combination of air and soap.)
Dawn’s foaming soap pump bottles aren’t the only ones you can refill with your own homemade foam soap.
For example, I have a unique pump bottle that once held Spaw Essentials foaming dog shampoo. It makes a great man-size soap dispenser that we keep in the garage.
My husband used to lug the big bottle of Dawn dishwashing detergent from underneath the kitchen sink to the garden hose outside in order to wash his hands after working outdoors. But now he can just reach for a squirt or two from this bottle that I refilled with homemade foaming soap and keep on a shelf in the garage. (I knew I held onto that empty bottle for a reason!)
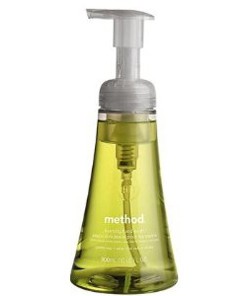 There are actually lots of products that come in foaming pump bottles:
- Method Foaming Hand Soap
- GoJo Foam Handwashing Soap
- Dial Foam Soap
- Pampers Foaming Soaps & Shampoos
- Cleanwell Foam Soap
When the product is used up, simply refill the foam pump bottles with your own liquid soap and water recipe.
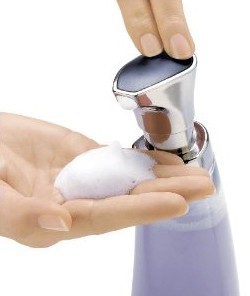 Or, you could start with a brand new refillable bottle that’s designed specifically to hold foaming soap like these:
- Kitchenaid Foam Soap Dispenser
- Foam Pump Bottles For Soapmakers
- Cuisipro Foam Pump
- RSVP Acrylic Foaming Soap Dispenser
- Umbra Stainless Looking Foam Soap Pump
Those are some of the most unique pump bottles that you can use for your homemade foaming soap. Find the size and shape you like, then spray paint it to match your room’s decor!
Psst… You could even use fun painting techniques on your spray painted bottles like these:
Rubber Band Etching Technique — spray paint 1 color first, add rubber bands, then paint another color.
Transparent Tape Technique — apply tape to the bottle before spray painting.
Chalkboard Paint Technique — yes, chalkboard paint can be used on plastic bottles too!
How To Make Your Foam Bottles More Attractive
For the most part, I have no problem leaving the pump bottles alone with their original product details covering the front and back of the bottle.
But if you’ve got some time to kill and you’re feeling a little crafty, then do what I did: spray paint your foaming soap pump bottles in fun colors!
That’s right, you can paint them whatever color you choose — to match your room’s decor.
Using this example as my inspiration, I spray painted the Dawn foaming soap bottle that I keep in the kitchen an oil-rubbed bronze color! (I used Rustoleum‘s any surface, any angle Universal Paint & Primer in one.)
It looks great because our entire house is accented with this color — from the light fixtures and hardware that were here when we moved in, to the home decor and accessories that I’ve added myself.
TIP: Be sure to spray the entire bottle and pump (while it’s firmly secured in the bottle itself) from all angles. Otherwise, you’ll see tiny specks of white in all the spaces you missed!
More About Foaming Soap & Pump Bottles
How Much Will It Really Save? Here’s The Math

