Rain barrels are having a massive moment. And for good reason: the math is staggering:
- A single inch of rain falling on an average 1,000-square-foot roof yields roughly 623 gallons of water.
- In practical terms… a brief, half-inch summer shower will completely fill a standard 55-gallon barrel!

So while everyone is rushing to make rain barrels right now, I think it’s wise to slow down and think through the entire process first. That way, your first rain barrel will be your best rain barrel.
If you don’t think through the physics of water storage, you risk creating a smelly, mosquito-breeding structural hazard right against your home’s foundation.
This is the ultimate guide on how to build, maintain, and winterize a highly efficient home rainwater system yourself!
Did You Know?… Some cities will even give you a FREE rain barrel! Check with your local water department to see if they have any free rain barrel kits available for local residents. Los Angeles, Tampa, and Cleveland are a few of the cities with free rain barrel programs.
The Golden Rules of Rainwater Collection

| What to DO | What to AVOID |
| Install an overflow diverter. When the barrel fills, excess water must automatically route back down the downspout, not pool at your foundation. | Never drink or cook with it. Roof runoff contains bird droppings, biological debris, and potentially toxic chemical traces from asphalt shingles. |
| Elevate the barrel. Water is heavy and relies on gravity. Raising your barrel on cinder blocks drastically improves hose pressure. | Never reuse toxic containers. Only source food-grade barrels (like old pickle or juice drums). Avoid anything that once held commercial chemicals. |
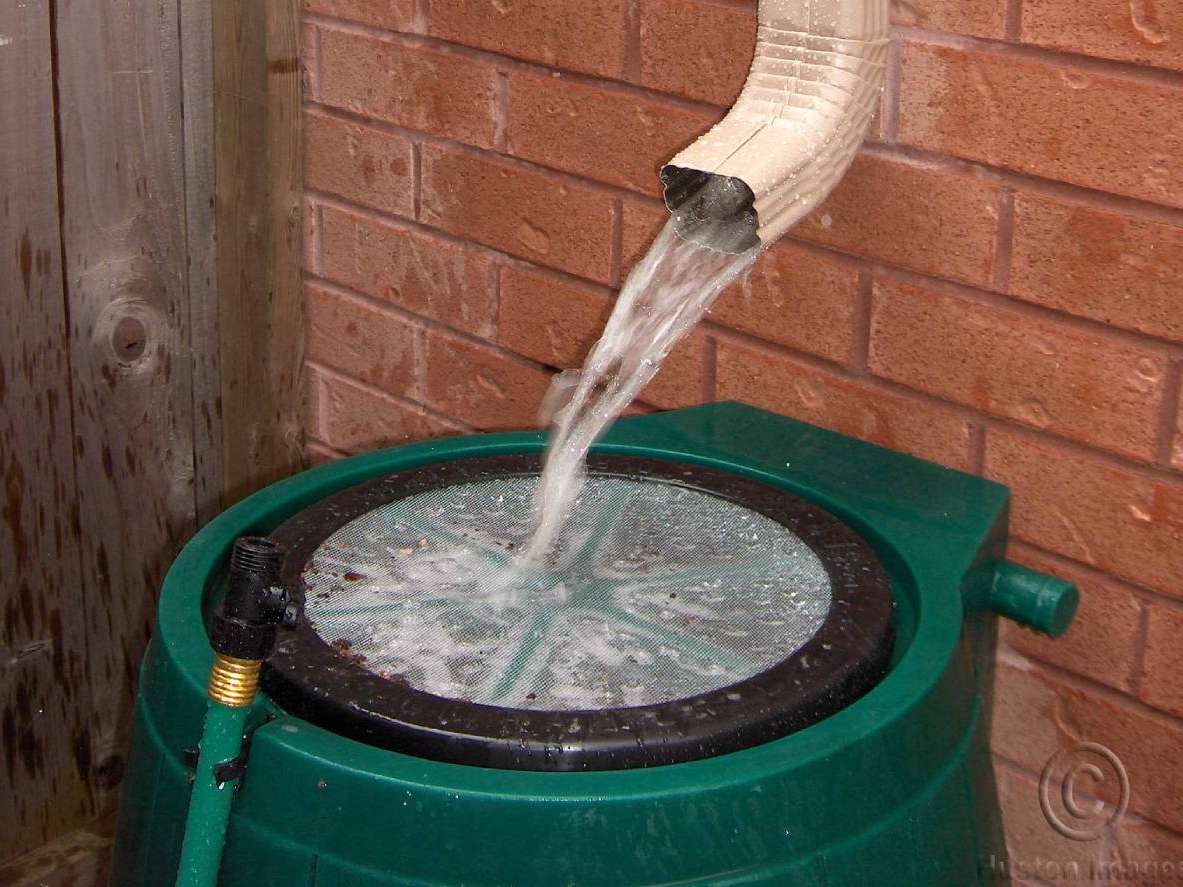
| Seal every entry point. Use fine mesh screening on the intake to keep out debris, rodents, and breeding insects. | Never let it freeze full. Water expands by about 9% when freezing. A full barrel left out in winter will split down the seams. |
Pro Tip – It’s imperative to make sure that your rain barrel adapts for overflow. Either direct excess rainwater away from the barrel OR link multiple barrels together. A rain barrel diverter is the most popular option — it keeps the collected rain water from overflowing when your barrel is full by diverting the water back to your downspout instead of into the barrel.
How To Build A DIY Rain Barrel In 3 Steps
You don’t need to buy an expensive commercial kit. A heavy-duty, 32-gallon plastic trash can with a locking lid works perfectly as a budget-friendly alternative.
#1 – Drill the Intake and Overflow
Using a hole saw, cut a hole in the lid matching the diameter of your downspout. On the upper side of the barrel, drill a secondary hole for your overflow valve or a connector kit to link a second barrel. Cover the main top intake securely with fine aluminum window mesh to lock out mosquitoes. This mesh rain barrel cover keeps mosquitoes and debris out of the barrel quite well.
#2 – Install the Bottom Spigot
Drill a hole 3 inches from the absolute bottom of the barrel (leaving room underneath prevents heavy sediment from clogging your valve). Screw in a 3/4-inch brass spigot wrapped in Teflon plumbing tape, clamping it tight on the inside with a rubber washer and a matching nut.
#3 – Elevate and Connect
For a gravity-fed setup, level a steady patch of ground next to your downspout and stack solid concrete cinder blocks at least 12 to 18 inches high. Set the barrel on top. Cut your existing metal or vinyl downspout to size, and channel it directly into the mesh-covered top opening.
Pro Tip – Use this Rainwater Collection Calculator to determine the average amount of rainfall that you can physically collect based on the average rainfall where you live. (Once you know your average rainfall, use this formula: 1″ of rainfall over 1,000 sf will yield 623 gallons.)
This video provides a good summary of the 7 biggest rain barrel mistakes that people make:
This next video shows some outside-the-box ideas when using a rain barrel to harvest rain water:
Other DIY Rain Barrel Instructions
To see how other DIYers have made their own rain barrels, check these out:
- Build Your Own Rain Barrel (Family Handyman)
- Super Cheap & Easy DIY Rain Barrel (Green Living Guide)
- How To Make A Rain Barrel Step-By-Step (Young House Love)
- 3 DIY Cheap Rain Barrels That Actually Look Nice (Green Living Guide)
- How To Set Up A Rain Barrel System At Home (Treehugger)
- Build Your Own Rain Barrel (Mid-America Regional Council)
- 3 Ways To Make A Rain Barrel For Less Than $10 (Green Living Guide)
This is a great video that shows how to recycle rain water — rather than letting it become wastewater:
4 Ways to Fix Green or Smelly Water
If stagnant water sits untreated in the sun, it will eventually turn into a stagnant, smelly bio-soup.
If your rain barrel goes green or starts throwing off odors, use one of these 4 tried & true remedies:
- The Ecosystem Hack (Goldfish) – Drop 2 or 3 cheap feeder goldfish directly into the barrel. They will instantly consume the algae and devour every single mosquito larva before it can hatch. NOTE: Goldfish are an invasive species—never release them into local streams when draining your barrel. For colder climates, tiny rice fish work even better because they tolerate extreme temperature swings.
- The Organic Destroyer (Barley Straw) – Drop a handful of barley-straw pellets into the water. As the straw slowly decomposes in the water, it releases a microscopic amount of hydrogen peroxide that naturally kills the algae without harming your garden plants.
- The Quick Acid Flush (Vinegar) – Pour 1 cup of standard white household vinegar into a full barrel of water. This shifts the pH slightly, clearing up mild cloudiness and neutralizing odors within 24 hours.
- The Captain Patio Method (3% Hydrogen Peroxide) – Empty a standard bottle of 3% hydrogen peroxide into the barrel. It acts as an immediate oxidizer, destroying anaerobic bacteria and the sulfur-like stench on contact, then breaking down cleanly into pure water and oxygen.
Pro Tip – The goldfish and vinegar options (separately) will also kill mosquito larvae — so you won’t have to deal with mosquitoes any longer!
How To Winterize Your Rain Barrel
If you live in a climate where the ground freezes, winterizing your setup is a must:
- Before the first hard frost hits your area, open the bottom spigot and completely drain the system.
- Disconnect the barrel from the downspout entirely.
- Flip the barrel completely upside down in your yard or store it inside a shed or garage.
- Reattach a temporary flexible extension tube to your home’s downspout to ensure winter snowmelt routes cleanly away from your basement walls.
This video shows how to properly winterize a rain barrel:
A good read… Top 10 Winter Uses For Rainwater
More DIY Rain Barrel Tips
Here are a few more tips to help you make the best rain barrel set-up for your space:
- How to make apartment-sized rain barrels for water collection. You could also just leave a few jugs or buckets out during the rain to collect rain water that you can use later — just be sure to place clean containers in areas with the heaviest rainfall runoff.
- A step-by-step tutorial for how to fix a cracked rain barrel. Sometimes all it takes is a piece of fabric and some silicone caulk to repair a crack. (Good rain barrel winterization tips here, too!)
- I love this idea of using an everyday plastic trash can and its matching lid as a cheap and easy rain barrel.
- An amazing collection of helpful tips from someone who’s been using rain barrels for over 10 years. Learn why and how to use a diverter to connect a rain barrel to a downspout, why and how to raise your rain barrels higher, the easiest ways to transport the rain barrel water, and many more great ideas from The Gardener Wife.
If you found this post helpful, it would mean the world to me if you would share with others on Pinterest: