Got any used drum sets sitting around? What about old drum sets that are sentimental to you or someone else in your family?
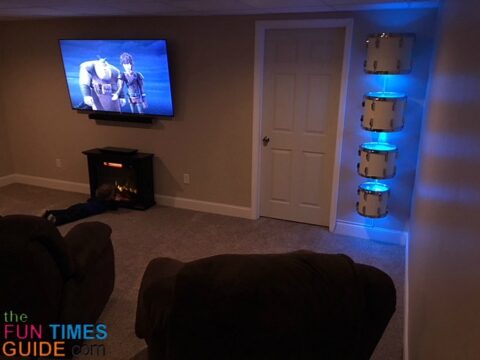
Here’s a functional way to use an adult drum set in a whole new way — while keeping the drums safe until they are used again!
I’ve been on a Marie Kondo kick lately and found my husband’s Pearl Yamaha 4-piece drum set from high school. I’ve hinted that he should set them up in our new finished basement. But he refuses each time — saying that he’s happy with his electronic drum set (which we have set up in the basement guest bedroom).
I came across this cool idea on Facebook one day and sent my husband the screenshot asking if it would be something that he would be interested in doing in our theater room. He thought this repurposed drum set idea was pretty cool and encouraged me to attempt the project. (He had no idea that I would actually follow through with it!)
Materials Used For This Repurposed Drum Set Project
Following are the supplies I used to turn a 4-piece drum set into a pretty cool LED light fixture:
- 4 Tom drums, ranging in sizes from small to big
- 4 5/16 2.5 inch hex bolts
- 13 5/16 flat washers
- 5/16 Ratcheting wrench
- 1 4-pack of metal table leg support plates
- 2 6-packs of 1-in x 3/16-in dia drywall anchors (with screws included)
- 2 6-packs of 2-inch #8 wood screws
- Cordless drill
- Drill bits (1/16, 3/16, and Philips head)
- Measuring tape
- Pencil
- Stud finder
- Level
- Rubber mallet
- 1 Cord hider (60-inches long)
- LED strip lights (16.4-foot)
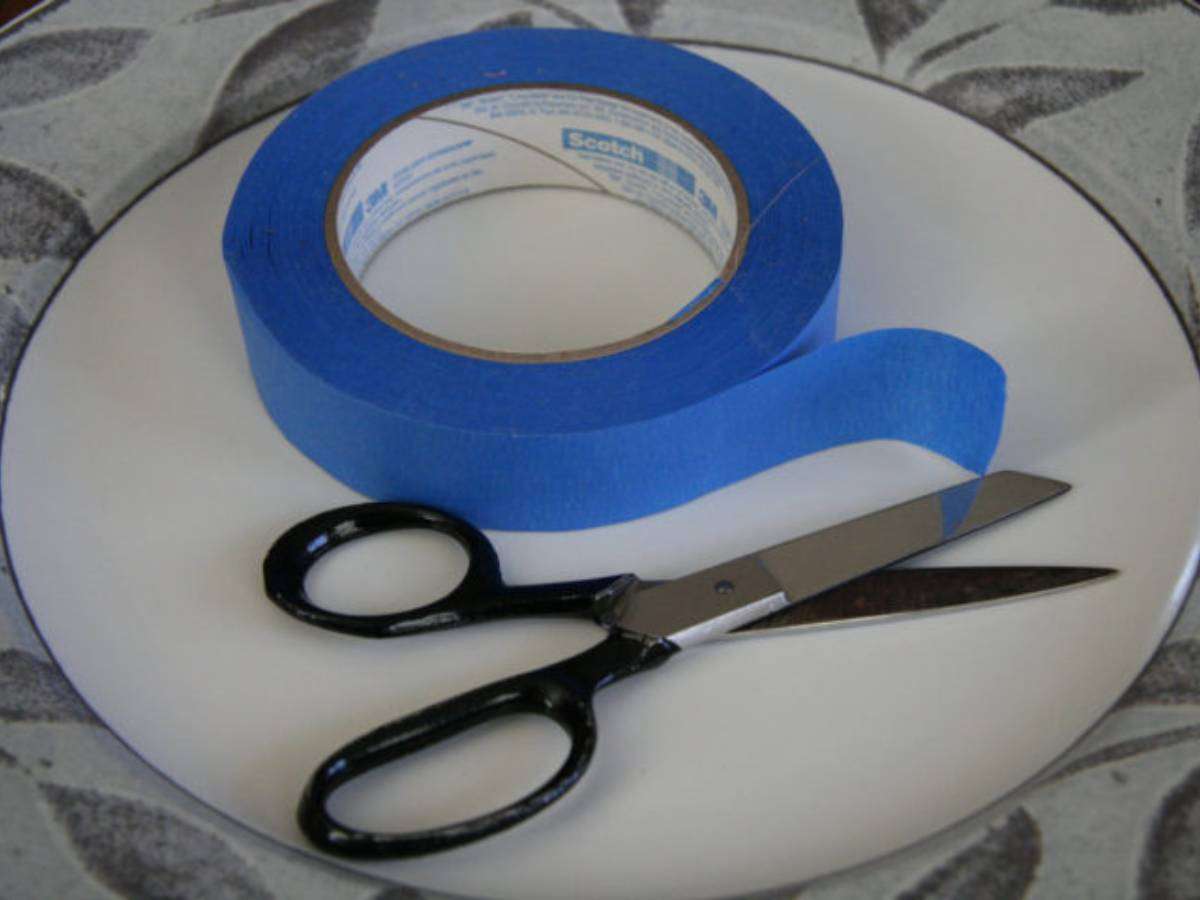
- Scissors
I spent approximately $40 on the hardware and LED light strip — which worked out to $10 per drum.
DIY Repurposed Drum Set Instructions
Here is how I mounted and lit the 4-piece drum set on the wall:
#1 – First, I determined where this repurposed drum set would look best in our theater room, and I visualized ways to mount the drums — so they would appear to be floating off the wall. I didn’t want bulky hardware or shelves. After several attempts of trial and error with various mounting theories, I was able to come up with a plan.
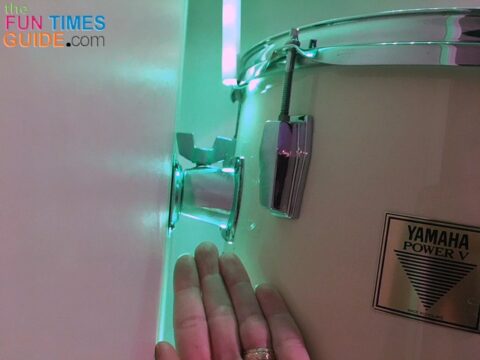
NOTE: I ultimately determined the best way to mount them would be a 2.5 inch long 5/16 bolt with 3 flat washers for spacing through the inside of the existing mounting bracket on each drum. The bolt would then screw into a table leg support plate mounted on the wall. The bolt would be tightened from within the drum for a snug fit against the support plate.
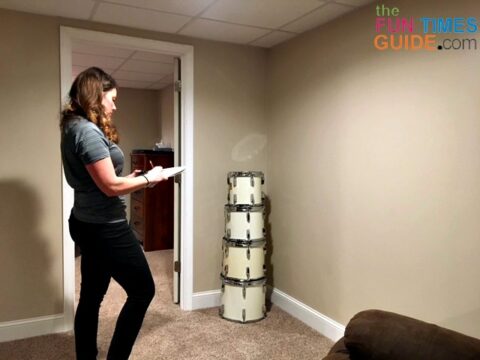
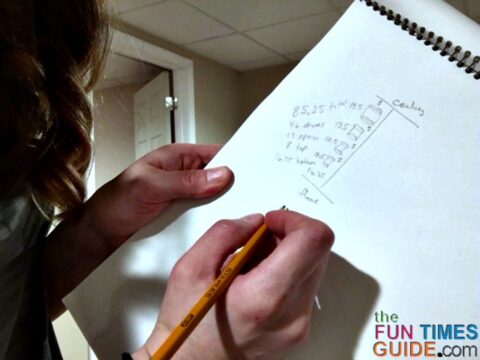
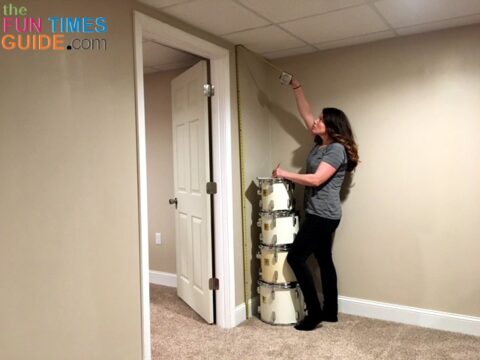
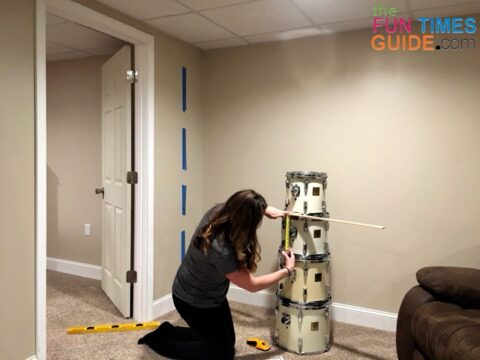
#2 – I gathered the drums and did some quick measurements. (Floor to ceiling total length. Height of each drum. Height of each drum’s mounting holes.)
NOTE: Ultimately, I determined that I wanted 5 inches of space between each drum. I added the total of all drum heights to the three 5-inch spaces to calculate the entirety of the space used. From there, I determined I wanted the bottom of the lowest drum at least 16.5 inches up from the floor — leaving 8 inches at the top (from the ceiling to the top of highest drum). I thought this would be a good offset.
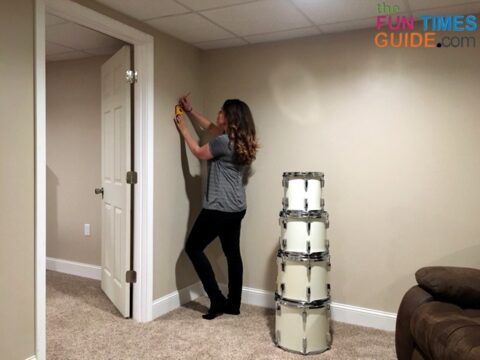
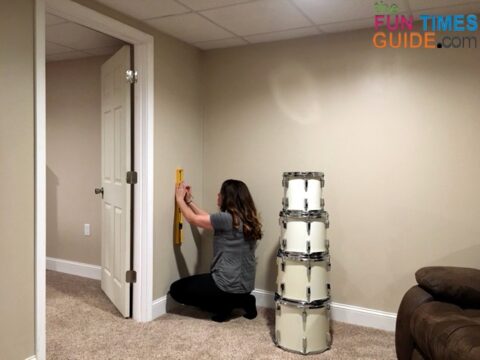
#3 – With my measurements on paper, I used a stud finder to locate the stud in the wall where the drums would be mounted.
NOTE: I could only use the one inside wall in the basement — because the other wall to the corner was an outside wall with cinder block beyond the drywall. Therefore, using the outside wall was not an option to drill into or to use as an anchor.
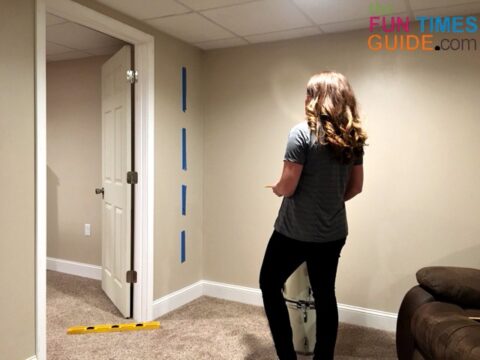
#4 – Using my measurements, I made a small pencil mark where the top and bottom of each drum would line up next to the wall, using the letters “T” (top) and “B” (bottom).
I did this so that I could see visually if the offset of the drum placement was a good choice — in case I wanted to make any adjustments before drilling.
#5 – Once I felt the placement was good, I marked the measurement of the center of the wall support mounting hardware. (I measured from the top of each drum to the center of each mounting bracket on the drum to determine this number.)
NOTE: Turns out it was 4.5 inches for each drum — no matter the size. Since I already had the top of the drum placement marked on the wall, I simply measured and marked an “X” 4.5 inches down from each “T” (top) mark following the stud line.
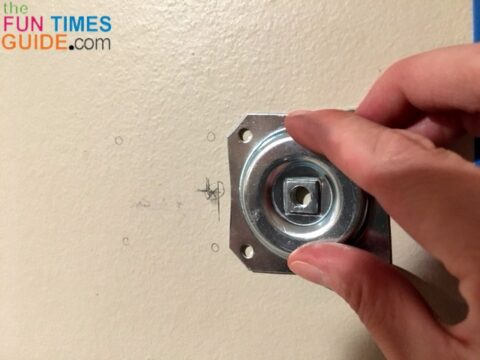
#6 – With all of the “X” marks on the wall positioned properly, it was time to mark my drill holes for the table leg support plates.
NOTE: Since the plate was 2 inches wide, only 2 of the 4 holes would actually connect with the stud (because wall studs are approximately 1.5 inches wide — not a full 2 inches). So the other 2 holes of the support plate would have to make do with drywall anchor screws.
I lined up the “X” with the center of the right side of the plate, used a level, and then traced the 4 screw holes in place. I repeated this process until I had all 4 support plates and the 16 screw holes traced.
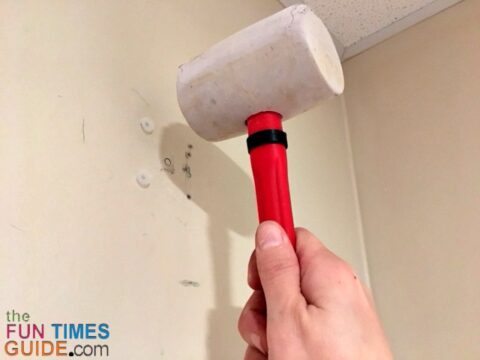
#7 – I used a 1/16 drill bit to pre-drill the 8 stud holes and a 3/16 drill bit for the drywall holes. Then, I inserted the drywall toggle anchors into the left side line (non stud side) and used a rubber mallet to get them flush to the wall.
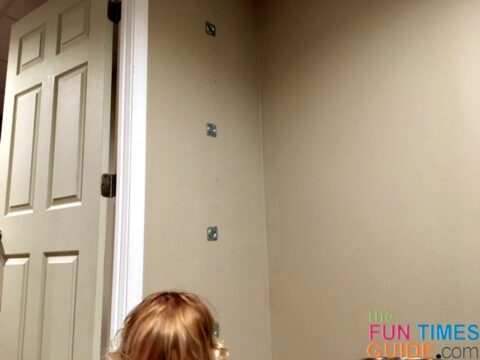
#8 – Next, I used the 2-inch #8 wood screws to mount the 4 support plates to the wall on the right side line (stud side), drilling into the stud. Then, I drilled the left side screws that came in the package into the drywall toggle anchors.
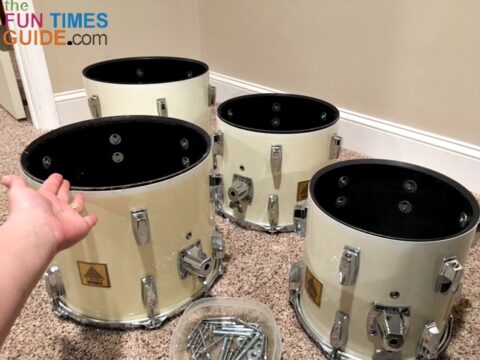
#9 – With all 4 support plates mounted to the wall, it was time to prep the drums for mounting.
I would need access to the inside of each drum in order to insert and tighten the bolt — so I removed the bottom heads of each drum using the drum key.
TIP: I realized later through a change of lighting plans when installing the LED light strips that I would also have to remove the top heads of the bottom 3 drums. Save yourself the grief and remove these as well, prior to installation.
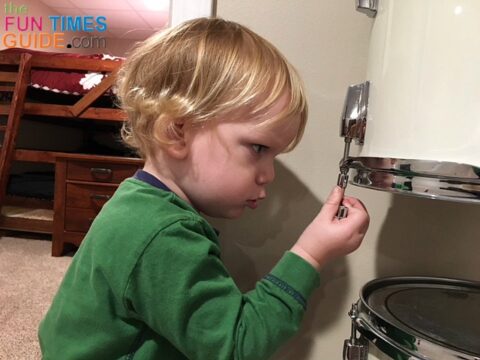
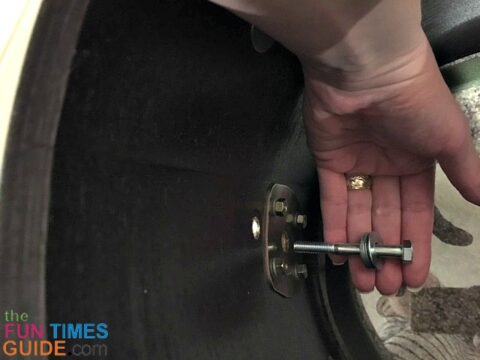
#10 – I grabbed the four 5/16 bolts, 3 washers, and ratcheting wrench — and started mounting the drums to the wall, beginning with the top big drum. Here’s how to do it:
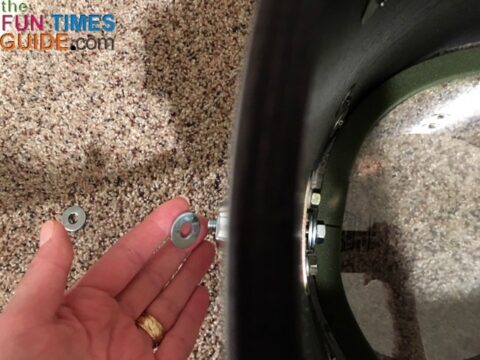
- Place 2 flat washers (for spacing) onto the bolt and insert the bolt with washers through the drum mounting bracket. Then, add the third washer in between the support plate on the wall and the drum bracket, as seen here:
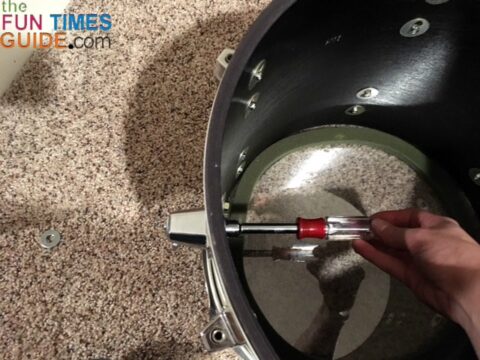
- Once it’s lined up to the support plate on the wall, tighten the bolt in place:
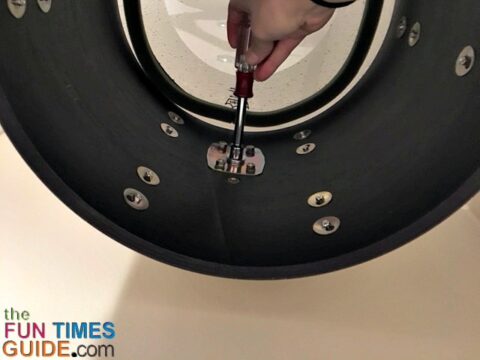
- And… the first drum is now secure:
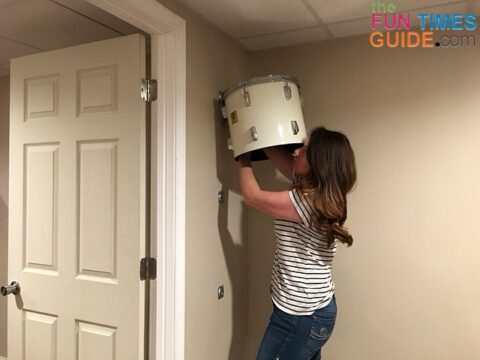
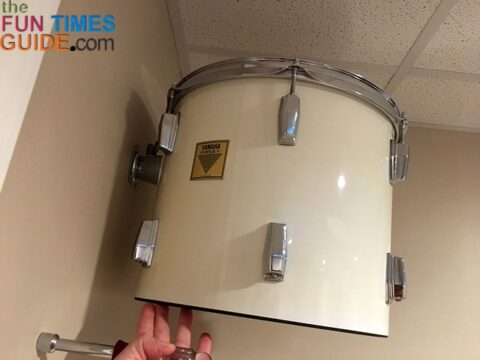
- I repeated this same process until all 4 of the drums were securely installed on the wall:

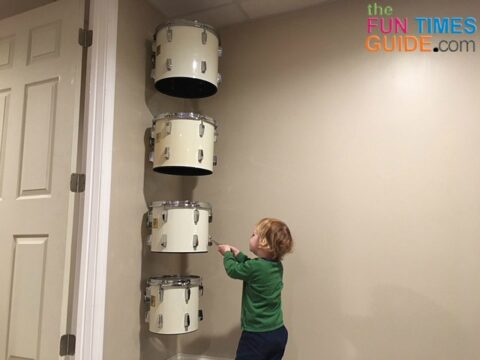
NOTE: Since the bottom drum has less of a curve, it required 3 washers on the inside for spacing and one on the outside between the drum and the mounting plate. The other 3 drums were good with the 2 + 1 washer setup.
#11 – For the light strip portion, I unraveled the spool and plugged in the light strip and made sure it worked first. Then, I secured the LED light strip to the wall-mounted drums. Here’s how:
- Place the plug end at the very bottom of the lowest drum.
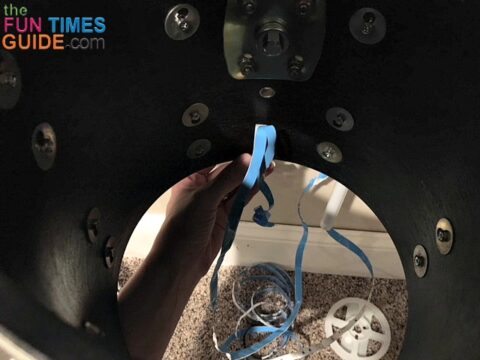
- Remove the film that protects the adhesive in small increments and start sticking the strip of lights up the inside back side of the drum — to the center and then around the inside perimeter of the drum.
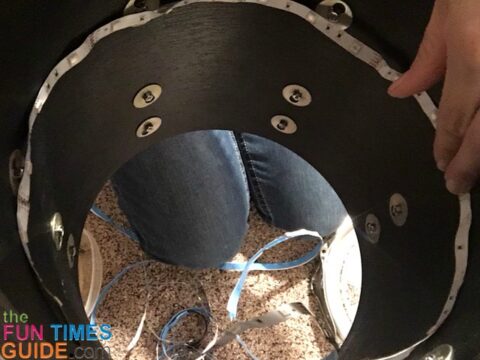
TIP: Once the full circle of the drum has strip lights attached, cut off the excess protective film. But be sure to leave the next portion of the film on the light strip — because it will continue up the inside back side of the drum all the way to the drum above it.
- Leave the film on the adhesive for this portion, because you are going to be sliding this part of the light strip into a cord hider — to hide the light path it would create on the outside of the drums. (Make sure to leave enough slack to allow for the drum heads to be replaced.)
- Repeat this process all the way up to the top drum. Be sure to turn the LED lights to face the wall (for the path up to the next drum) — so there won’t be any glaring lights at eye level.
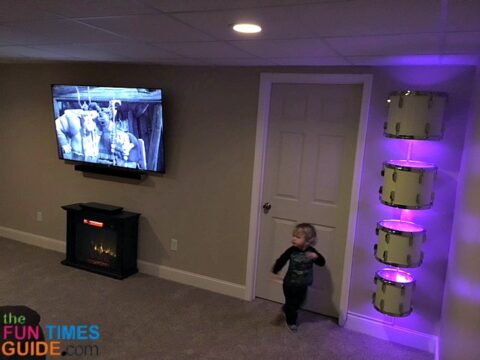
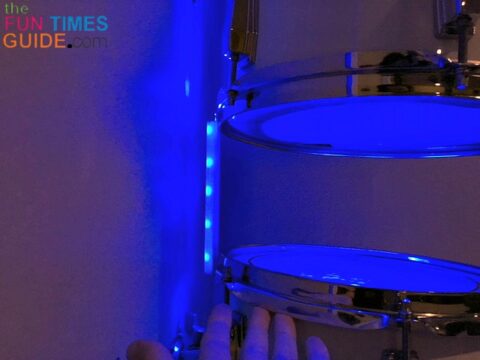
#12 – With the light strip in place for all 4 drums, I replaced all the heads on each drum — but I didn’t tighten them too tightly because I didn’t want to crimp the electronics of the LED light strip. I also made sure to line up the exposed strip lighting closest to the back part of the drum — so it would be as close to the wall and as straight as possible.
NOTE: For a seamless look with the lights between the drums (along the wall), I used cord hiders that have adhesive backing to hide the small strip of lights in the three 5-inch spaces between the 4 drums. However, I didn’t actually use the adhesive part — because the cord hider itself rests on the rims of the connecting drums and stays upright with the taught light strip.
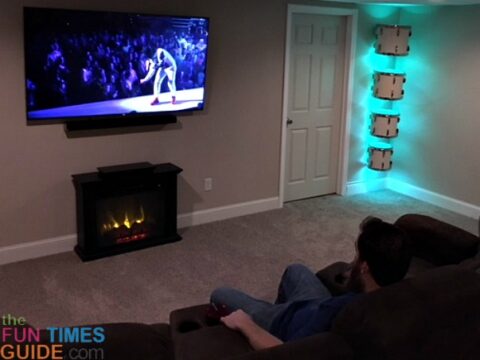
#13 – Finally, I plugged in the light strip and turned off the overhead lights in the room — so I could get the full effect of the LED lights in various colors.
NOTE: The lights came with a remote control to operate 16 basic colors and 8 lighting modes (including a dimmer option) — for an endless variety of ambiance. My 2-year-old son loves to play with the remote and switch up the lights!
The Bottom Line…
Even though this project took quite a bit of thought, trials, and failed theories, I am super stoked how this drum installation turned out! The cool lighting effect really completes our family theater room.
Best of all, the drums were not hurt or altered in any way — so they can be taken down and used at any time. (Who knows… maybe our son will want to play his daddy’s drums one day.)
This repurposed drum set is great because we now have a way to safely store the drums in our home while providing a funky piece of home decor at the same time. And since it’s also functional as a light source, we get to enjoy some awesome ambience whenever we are using the space!
I really hope you enjoyed this tutorial and get inspired to repurpose or re-display any sentimental items that you may have. I would love to see your creations — please share in the comments below.

